 Hello Sour Brewers!
When thinking about the creation of sour and farmhouse beers, a number of images such as rows of oak foudres, Brettanomyces pellicles, and sampling glasses being filled from a barrel head often come to mind. To these styles, there’s no question that mixed groupings of yeast and bacteria are key characters in the show. But before these organisms get the chance to step into the spotlight, a dedicated brewer must set the stage for their performance. In this article, we are going to explore the different ways that brewers can set this stage, and how different ingredient and process decisions made during the brew day may affect a sour beer during fermentation and aging.
Article Contents
I often think of a sour beer as a collaboration between the brewer and the microorganisms involved, with one party or the other having a greater deal of control at different times. A sour beer begins its life like any other beer, at the control of the brewer during the brew day. Like a baton in a relay race, this control is then handed off to the microorganisms during fermentation, only to be taken back by the brewer during the blending process. If a beer is to be bottle conditioned, the 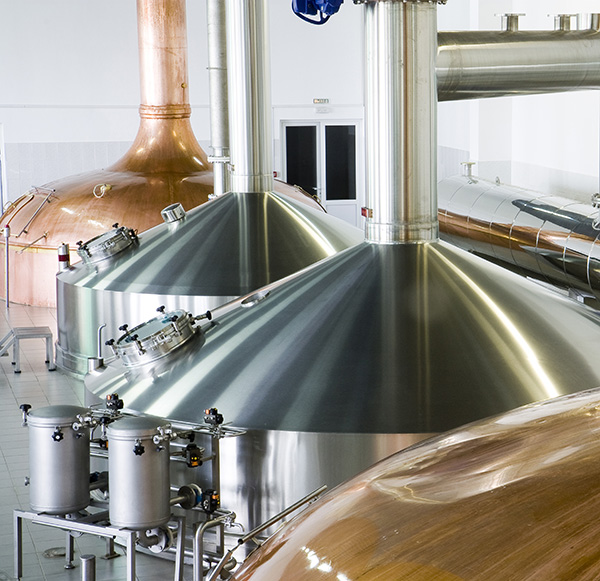 microbes will get to have the final word on that beer’s flavor, as changes often still occur after the blending and bottling process. I believe that remembering this big picture approach to sour beer creation is important for brewers, because it reminds us that we are not alone in determining the ultimate fate of our beers. This picture also highlights the two times when we as brewers have the most control over our creations, during the brew day and during the blending process. If you’ve been following along with my series of articles on aged and blended sour beers, you may have already read the articles covering fermentation management and blending. This article marks the third in the series and will cover the sour beer brew day.
The goal of this article will be to discuss aspects of sour beer recipe creation and brew day processes that can be controlled to yield differing results. As a roadmap, these topics will include ingredient choices, recipe formulation, as well as mashing, sparging, boiling, and cooling processes. Many of these topics are not exclusive to sour brewing and will contain information applicable to a wide variety of beer styles. We will also cover in detail a few topics unique to the sour beer world such as the creation of traditional lambic wort for spontaneous fermentation and raw “no-boil” beers. Let’s get started with a discussion of ingredients and recipe formulation.
Creating Sour Beer Recipes
As a general rule, sour beers derive the essential backbone of their flavor balance from an interplay between “sweet” malt characteristics and the “sour” flavors provided from a variety of organic acids. The reason these beers taste fundamentally different from classic beer styles is a result of the swapping of classic hop bitterness for acid sourness. When first tasting and learning about sour beers, it’s easy to get hung up on their acidity, thinking erroneously that these acids are responsible for the complexity present in many sour beers… For the most part, this is not true.
The two most common acids in sour beers are lactic and acetic acid, created respectively by lactic acid bacteria and Brettanomyces. For most tasters, and at average concentrations, these acids taste different, lactic acid tends to provide a soft, tangy, fruity acidity reminiscent of greek yogurt or sauerkraut. Meanwhile, acetic acid tends to come across a bit more biting and vinegary when tasted at similar concentrations to lactic acid. Most aged and blended sour beers will portray a combination of these two acids in a balance that provides a rounded sourness that triggers both salivary and trigeminal nerve sensations (they get you in the jowls). Depending upon the use of specialty ingredients such as fruits and spices, sour beers may also contain malic, citric, or tartaric acids as well. While each of these have a slightly different flavor, they all tend to fall in line with lactic acid in providing some degree of generalized backbone acidity. The reason I bring all of this up is to emphasize the concept that, while different sour beers may have varying acid profiles, these acids only give rise to a small portion of the overall complexity in these beers. As a brewer, it’s important not to get hung up on the overall acidity of a sour beer as being the most important goal to shoot for. Virtually any well crafted sour beer will taste great at a relatively wide range of acidity levels. Degree of acidity and beer quality are not related, and there are a tremendous number of sour beers being produced both at home and professionally that would likely benefit from a little less, rather than a little more, acidity.
Don’t get me wrong… I love a plethora of bracingly sour beers. My point here is to emphasize that sour beers are much more than just their acidity, and that big acidity in the absence of other interesting flavors makes for a pretty one-dimensional experience. So with that said, let’s take a look at the portions of a sour beer recipe that do provide complexity:
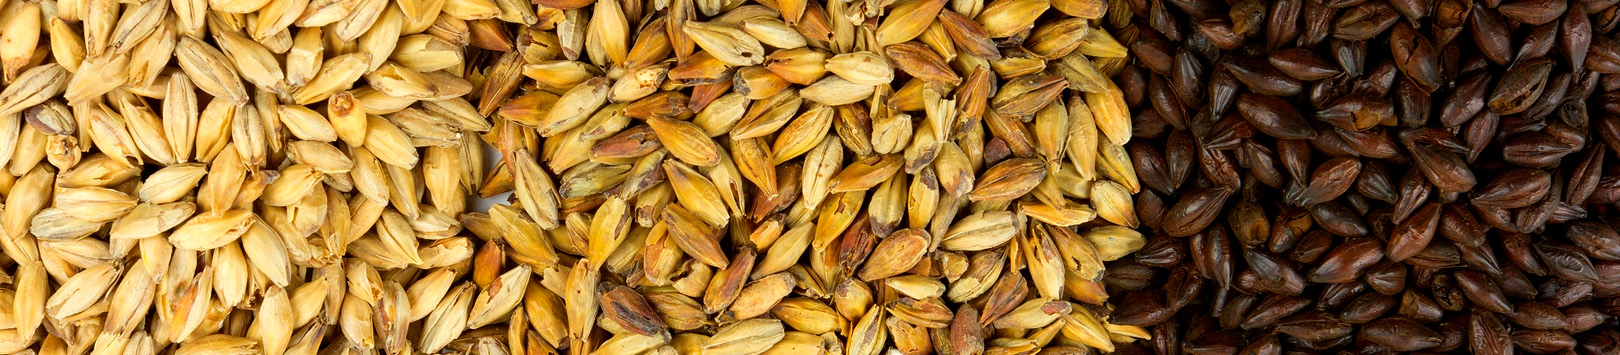
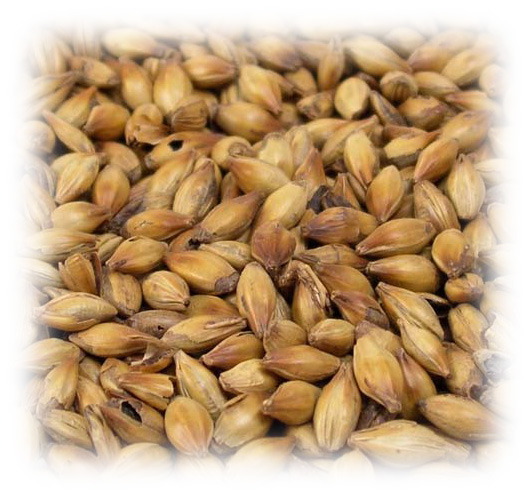
Malt, Grain, & Fermentable Choices
When creating a sour beer recipe, the other half of the “sweet and sour” backbone is provided by a brewer’s choice of fermentables. While at best there may be half a dozen major acids in a sour beer, the number of flavor compounds that can be contributed by malted or unmalted grains numbers easily into the hundreds. If a recipe contains fruit, either as a hot side kettle addition or as a cold side fermentation / blending addition, the flavor possibilities contributed by fermentables become expanded to an even greater degree. My goal in writing this article is not to discuss an endless number of permutations of malt choices, but rather to highlight a few ways of thinking about these choices in regard to a sour beer’s overall flavor presentation.
Let’s start this discussion with what I imagine to be a recipe for the world’s least complex sour beer:
 Dr. Slambic’s Lawnmower Sour
40% Corn or Rice (Cereal Mashed)
60% American 2-Row Brewer’s Malt
No Hops
Kettle Soured with a single strain of Lactobacillus plantarum
Re-boiled
Fermented to completion with California Ale yeast
While I included the adjunct corn or rice to draw obvious attention to the recipe’s similarities to American Light Lager, if you swapped those out with white wheat malt, this recipe would mirror those being used for a large number of both Berliner Weisse and American Golden Sour base beers. Such a recipe has either the benefit or the detriment of ending up with virtually no distinct malt character. This can be a good thing if you plan to highlight other unique ingredients like fruit, age the beer in a subtle oak such as used white wine barrels, or if you plan to allow the beer to develop unique fermentation flavors through long aging with a mixed culture.
However, even in situations like these, I feel that golden sour beers and “Berliner Weisse”-ish beers tend to benefit from a little more malt complexity. Don’t be afraid to swap in character-rich options such as floor malted Pilsner or an English Maris Otter varietal for all of your base malt. Likewise, swapping out all or a portion of the white wheat malt with options like spelt, oats, or rye can add another layer of complexity to these beers. Malts such as Vienna, Munich, Aromatic, Biscuit, or Honey can also make fine additions to a golden sour recipe.
The goal of such substitutions would be to introduce a wider variety of malt flavors to these beers. Flavors like crackers, flour, biscuits, honey, bread, spice, nuts and grain are easy to layer into the background of a sour beer. Unlike roasted or caramelized malts, which we will discuss next, characterful base malts can generally be used without the risk of becoming cloying or detracting from other elements of the flavor profile such as its esters, phenols, fruit, or oak contributions.
If we apply these ingredient concepts and a more complex fermentation plan to our original recipe, we may come up with something like this:
Dr. Lambic’s Fireside Sour
50% Floor Malted Pilsner
10% Vienna
30% White Wheat Malt
10% Rye Malt
Kettle Soured with a single strain of Lactobacillus plantarum
Re-boiled with 10 to 15 IBUs late addition Hallertauer
Fermented to attenuation with German Ale Yeast
Aged for 3 months on a Brettanomyces blend
As a result of our ingredient choices, we would expect a wider spectrum of malty flavors to persist through fermentation and into the final product. Specifically, I would be looking for graininess, crackers, and flour from the Pilsner addition, bread crust from the Vienna, and a malty spice from the rye. To mirror souring from the first recipe, I kept the single strain kettle souring practice, but this time added some late noble variety kettle hops to the second boil, adding another layer of flavor complexity. The choice of a German Ale Yeast will help to retain a nice mouthfeel through the production of glycerol while also promoting the malty flavors of our ingredient choices. Finally, a relatively short aging cycle on a healthy pitch of Brettanomyces will promote a more complex bouquet of esters and phenols in the finished beer.
 Crystal malts are a common addition to Flanders Red recipes, but these malts can also make a synergistic addition to fruited sours. Or, for lighter Lovibond varieties (typically 10 to 30 L), crystal malts can be used to increase the mouthfeel and complexity of low-ABV golden sours in the same way that these malts are used to boost the backbone of session IPAs. Every SRM / Lovibond range for crystal malts will bring a different set of caramel, candy, raisin, stone-fruit, fruitcake, or lightly roasted flavors to the table. When writing recipes, these malts should be used sparingly. In many cases, the perception of sweetness imparted by these malts will continue to remain after fermentation and extended aging. Even in an aggressively sour beer, it is possible to create cloying sweetness with crystal malts, so proceed with caution when using them for more than a few percentage points of the total grain bill. Here is an example grain bill for a Flanders Red Ale to use as a starting point:
Dr. Lambic’s Startup Red:
50% Pilsner Malt (grain, cracker, flour)
20% Munich Malt (sweet, malty, grain)
20% White Wheat Malt (wheat, flour)
5% Caramel Wheat (candy, toffee, sweet caramel)
5% Special “B” Malt (plum, raisin, burnt sugar)
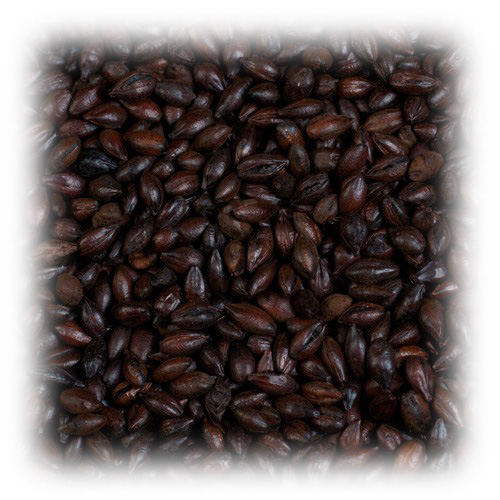 Finding their place in a wide range of brown to black sours, roasted malts will impart flavors such as coffee, cacao, chocolate, almond, toast, and dried fruit to these beers. It can be difficult to find the right balance between some of these flavors and the background acidity of a sour beer. But, when a recipe works well with both the acidity level and fermentation characteristics, these can be deeply layered and beautiful beers. Highly kilned malts contain nitrogen-based melanoidins in the pyrazine and pyridine groups that contribute acrid, burnt, and lightly smoky flavors to beer. To my palate, these flavors can accentuate the more negative aspects of phenols produced by Brettanomyces, making these compounds come across as plastic, medicinal, burnt rubber, and Band-Aid, as opposed to the more positive flavors (often contributed by the same phenols) of farmyard, spice, hay, wood, and bitter. Taking all of this into consideration, when designing a sour brown or black sour recipe, it is best to avoid the most highly kilned barley malts. Options that are de-husked or range in the lower roast SRM levels such as chocolate varieties of barley, wheat, or rye will help to avoid the acrid flavors most likely to clash with Brett phenolics. Here is an example grain bill for a deep brown / black sour:
Dr. Lambic’s Baseline Brown:
60% Maris Otter (bready, biscuit, nutty)
25% Munich Malt (sweet, malty, grain)
6% Aromatic Malt (deeply malty)
5% Extra Dark Crystal Malt (150 L) (toffee, raisin, fruitcake)
4% Midnight Wheat Malt (smooth roast, coffee)
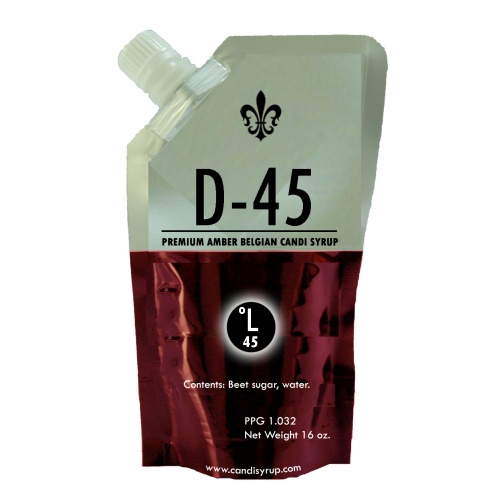 In general, sour brewers love experimentation, and as such may decide to include a wide variety of non-grain fermentable options during the mash or boil such as vegetables, fruits, honey, candy syrups, etc. When incorporating these types of ingredients, it’s important to keep in mind that the sugars they will contribute are generally of the highly fermentable type such as glucose, sucrose, or fructose. In classic brewing these additions can be used to increase ABV without increasing the body of a beer, or to create a wort that will attenuate to a higher degree than one composed entirely of malted ingredients. Both of these properties hold true in sour brewing as well, but additionally this modification of sugar balance towards the more fermentable may aid faster souring by Lactobacillus (these bacteria are adapted to most readily ferment simple sugars), reduce the long-chain sugars available to Brettanomyces during aging, and reduce the mouthfeel of a family of beers that already tend towards being thinner and drier.
The body and mouthfeel of a sour beer is something that should be considered during recipe development. In general, the following table highlights components of a sour beer that affect body and mouthfeel:

There are two issues in sour beer fermentation that can lead to a beer having an undesirably thin body and mouthfeel. The first of these is lack of glycerol production by Brettanomyces. The second is a nearly total reduction of residual dextrins (very high attenuation) in most mixed culture fermentations due to the ability of many strains of Brettanomyces and bacteria to produce enzymes which convert these long chain sugars into fermentable short chain sugars.
One method used to combat thin mouthfeel during recipe formulation is the inclusion of ingredients with higher levels of protein and beta-glucan content. In my experience, oats and rye make fantastic additions to nearly any sour beer recipe for this reason.
Incorporating Hops
As I alluded earlier in our discussion of a sour beer’s balance, these beers tend not to have high levels of bitterness, but this does not preclude the usage of hops altogether from sour beer recipes. In fact, hop bitterness and flavor can both add further layers of complexity to a sour beer’s profile and provide a means by which to control the acid producing bacteria in mixed culture fermentations. Additionally, hops can provide a sour beer mixed culture with a variety of aromatic alcohols and glycosides that can be biologically transformed into esters and other aromatic compounds. This creates the possibility for unique and appealing fermentation aromas which would not occur without the use of hops.
When choosing which hops to use, there are a great number of options. As a general rule more traditional European varieties such as Kent Goldings, Fuggles, Styrian Goldings, Hallertauer, or any noble hops will easily incorporate into the flavor profiles of most sour beer styles. It can be a little trickier to use American, New Zealand, or Australian options with a wider range of citrus, pine, and tropical fruit flavors. These options tend to work well if you have a mixed culture or fermentation plan that you’re experienced with, and can predict how the flavors of the hops will either enhance or clash with fermentation flavors. A third option is to use aged whole-leaf hops such as are used in traditional lambic-style brewing. These hops will add their own layer of funky, cheesy, papery flavors to a beer in addition to helping to restrain the activity of lactic acid bacteria.
For brewers who will be fermenting with fresh, lab sourced, mixed cultures, you will have to be very judicious with your hopping rates to allow these young cultures to properly acidify your beer. In these cases, a good recommendation is to stick to 10 IBUs or less starting out. On the other hand, many craft sour brewers with mixed cultures that have been in use for years will find that their strains develop the ability to acidify worts with 20 to 30 IBUs or greater, and that by targeting a certain rate, they can effectively manage the speed or degree to which their beers will acidify.
Another method of incorporating hops, which allows for even greater IBU levels involves an initial souring phase with lactic acid bacteria, followed by a second boil during which the hops are added. This method avoids the issue of the hops inhibiting these bacteria, but also prevents these bacteria from helping to develop a wider range of fermentation aromas and flavors with age. Keep in mind that big bitterness and big sourness do have a high tendency to clash on the palate, so bracingly sour double IPAs are probably not going to work out.
Water Considerations
When it comes to the topic of brewing water, there is little to nothing in a way of consensus regarding best practices. The traditional lambic brewers of Belgium all use local well water for their brewing needs, and other than filtering it and potentially adding calcium, they do little else to treat it despite the fact that it has a great deal of hardness. In my personal brewing, I start with reverse osmosis water and build back in enough calcium chloride and calcium sulfate to ensure a healthy fermentation. This process has worked well in regard to the flavor profiles for the majority of styles that I brew. I believe that if trying to recreate certain flavors common to traditional gueuze and lambic, that harder more mineral-rich water may be of benefit. But aside from this, I believe that the general concepts that apply to all brewing water (such as sulfates ability to accentuate hops while chloride accentuates maltiness) apply equally to sour beer styles and that, for the most part, soft water works well for any style.
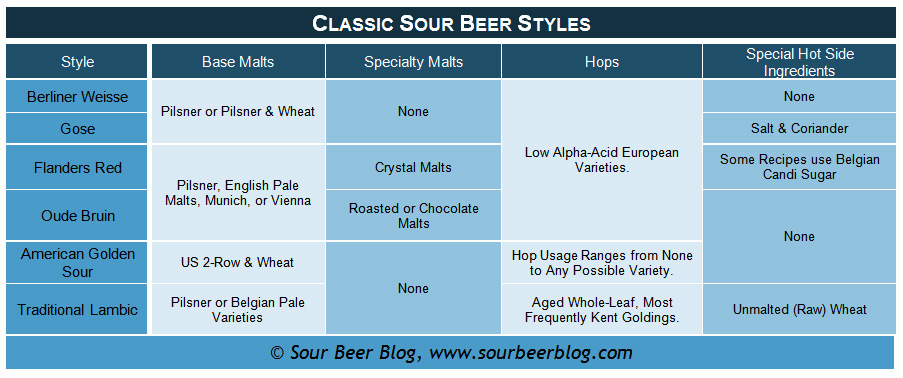
To wrap up the topic of ingredient selection, I have created a table to use as a reference for the general recipe structure of many classic sour beer styles. These styles developed their recipe parameters based both on flavor and historic availability of ingredients. I consider any of them to be a great starting point for writing your own recipes and I highly encourage brewers to experiment with non-traditional recipe ingredients.
Once a brewer has created their recipe, they will move onto the hot side processes of the brew day and find that a number of decisions can be made that will affect the final product. Let’s take a look at these processes now.
Brew Day Processes
The Mash

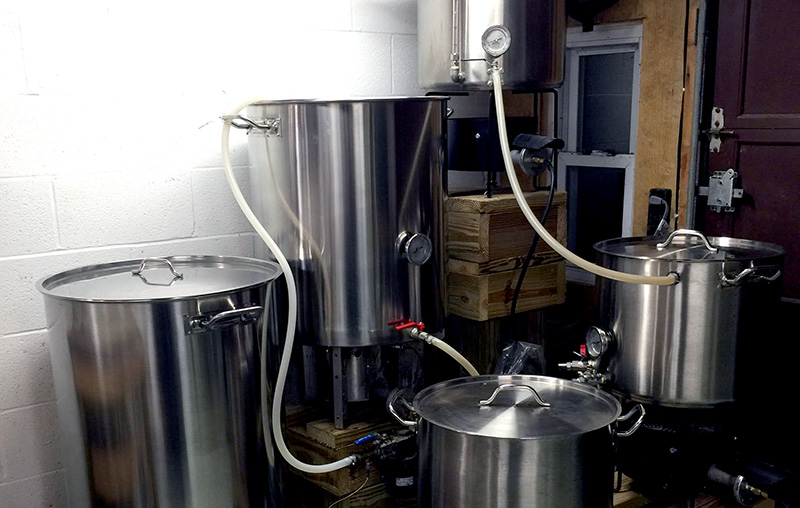
Dr. Lambic’s 15 Gallon Direct Fire Mash Tun
Mashing for sour beer production may, in many cases, be identical to mashing for non-sour beers and the exact methods used will have to be tailored to your particular equipment. My personal system makes it easy to step mash, so I tend to do so for all of my recipes. While most modern base malts are very highly modified, some of the non-barley components of our grain bills may be unmalted or under-modified. In these cases, step mashing may help to improve protein balance and overall efficiency when compared to one-step infusion mashing.
Regardless of mashing scheme, all brewers will have to choose what temperature range to utilize for their saccharification rest. During this step, a brewer can decide whether to opt for a more fermentable wort by optimizing the activity of beta-amylase (145-150° F), choosing to create a less fermentable wort by optimizing the activity of alpha-amylase (155-160° F), or shoot for a balance of the two at temperatures ranging from 150 to 155° F. My recommendation for making this decision is to base your choice upon your intended fermentation and aging plans for the beer.
If your intended beer will not include Brettanomyces or a mixed bacterial culture that will survive until packaging, any temperature range will work, and higher temperatures will result in a fuller body and mouthfeel just like they do in non-sour beer. On the other hand, if your plans for this beer include mixed culture fermentation and bottle packaging or conditioning, you will want to base your wort’s attenuative ability on the length of time you plan to wait until packaging. If you need the beer to be package ready in a short time frame, say 3 months, you will want to opt for a low mash temp resulting in a readily fermentable wort. A lower percentage of dextrins will allow the beer to fully attenuate and reach a point of gravity stability in a shorter time frame. All things considered, beers that reach stability in shorter time frames are also likely to be less complex than beers that slowly attenuate for longer periods of time.
This brings us to the other end of the spectrum. If your intention is to age a beer for a long time (say 6 months to 2 years) with a mixed culture of Brett and bacteria, then opting for more dextrinous wort will help to feed these organisms for a longer portion of the beers aging time, generally resulting in a more complex assortment of fermentation flavors. In such cases, a brewer may even opt to include a portion of starch in the finished wort, which can feed a culture for up to several years. This can be done by adding flour to the boil, adding a starch source such as pasta directly to the fermentation vessel, or more traditionally through a process of turbid mashing, which will be covered in its own section of this article.
Keep in mind that nearly all mixed culture sour beers that have become package stable will become very highly attenuated, so saccharification temperature choices will not correlate to body and mouthfeel the way that they do in beers fermented with Saccharomyces alone.
The Sparge
This will be the shortest section of this article because I view the sparge as being responsible for only one factor in a sour beer’s composition: grain tannin content. A sparge performed at a standard pH of 5.0 to 5.5 and within a temperature range of 170 to 174° F will minimize grain tannin extraction. Raising the pH of the mash bed to between 5.5 and 6.5, rinsing the grain bed with water at a temperature of 175 to 190° F, or a combination of both, will increase grain tannin extraction. These tannins are typically of the lower molecular weight variety and will taste harshly astringent in young beers. For these reasons, it is generally only appropriate to significantly enhance grain tannin content in sour beers that will age for long periods of time, such as occurs in traditional lambic production. Tannins can contribute an important mouthfeel and character to any sour beer, but the type and amount of tannins in these beers must be carefully considered. For a more complete treatment of this topic, check out my article on Tannins In Sour Beer.
The Boil
For this topic, I think the most useful way to organize different decisions to be made during the boil is to break the section up into a handful of various scenarios available to sour brewers:
A Standard Boil
In this scenario everything proceeds as it would for any traditional style of beer. A boil length decision should be made based on the SMM / DMS potential of the malt. Hops can be introduced as desired by the brewer. Kettle finings will aid in protein coagulation resulting in clearer wort and beer. Lastly, the boil will sanitize the wort, eliminating any unwanted bacteria or wild yeast which may have been present in the mash. A completely traditional boil is a great option for a number of sour beer styles. If Fast Souring by Lactobacillus is desired, you will need to restrain hop usage or eliminate hops from the recipe completely. If a mixed culture which includes Pediococcus is to be used for fermentation, your hop usage can be increased significantly. When utilizing one standard boil, any organisms introduced into the beer for fermentation and aging will remain there until packaging. This is the method I most frequently use for my mixed culture beers which will undergo both aging and eventual blending.
Boil, Bacterial Fermentation, Second Boil, Saccharomyces Fermentation
This is the practice that I recommend for any brewer who wants to produce a sour beer without the risk of introducing Brettanomyces or bacteria into their fermentation vessels. The first step, a short 15 minute boil is used to pasteurize the wort, eliminating unwanted microbes which can often survive the mash. This wort is then cooled and a culture of Lactobacillus or Pediococcus is introduced and monitored until the desired level of wort acidification has occurred. An initial reduction in wort pH to 4.5 using any food grade acid is a step which can both prevent unwanted bacterial contamination and also help to retain head-forming proteins which are often stripped out of a beer by Lactobacillus operating at higher pH levels. A second, full length, boil re-pasteurizes the wort, off-gases both malt sulphur compounds and vegetal sauerkraut-like aromas that result from many Lactobacillus fermentations, and allows the brewer to add any amount of hops desired for the recipe. This process will result in relatively clean and simple sour beers that can be fermented, processed, and packaged without risk of contamination to cold-side brewery equipment. Choice of Saccharomyces strains and secondary ingredients such as fruit, spices, or oak will go a long way toward differentiating and building complexity into such beers.
Raw / No-Boil Beers
Raw beers are a very interesting niche within the sour beer world both for their unique flavors and their time / energy saving methodology. In essence these beers are mashed and sparged as usual, but then receive either no additional treatment before being cooled and transferred into fermentation vessels or they are heated to between 170 to 180° F in order to achieve pasteurization without inducing a significant hot break or major conversion of SMM to DMS. Depending upon the process used, wild yeast and bacteria present in the grain bed may survive into the final product offering up their flavors for better or worse. In some cases, these microbes will positively enhance complexity and terroir. In other cases, bacteria may introduce butyric acid or other undesirable compounds into the beer.
Because no boil occurs, it can be difficult to directly introduce hop bitterness into these beers, but this can be overcome through the use of a secondary small batch of boiled beer. One homebrewer I have interviewed used this process to create an assortment of complex and delicious farmhouse style sour beers. Around 3/4 of the wort was produced using a no boil process while the remaining 1/4 of the wort was boiled and heavily hopped to achieve a high degree of bitterness. These worts were then combined in the fermentation vessel and pitched with a mixed culture of Sacc, Brett, and bacteria. The beers created using these methods had a great assortment of saison-like farmhouse flavors when young, which would eventually develop higher levels of acidity and funk as they aged.
No-boil beers tend to exhibit more protein and fatty acid content than their boiled counterparts, which can boost their mouthfeel and flavor complexity, a big plus for fans of this method. While this practice may not be optimal for every sour beer, and certainly reduces the level of control a brewer may attempt to retain through the use of known cultures, it is still a great option to understand and have available within your brewing toolkit.
Wort Cooling
After boiling, wort is typically cooled to fermentation temperature as quickly as possible both to reduce further conversion of SMM to DMS and to reduce the time period which wort spends at temperatures optimal for spoilage bacterial growth. For the most part, this practice remains unchanged for sour brewing, but I did want to discuss some of my experiences using a slow cooling process here as well. Due to scale and the realities of cooling large volumes of wort, these methods are likely to be applicable to homebrewing only.
One of my favorite practices for ensuring that my Lactobacillus fermentations remain uncontaminated is the transfer of boiling hot wort directly into a single wall stainless vessel, in my case 15.5 gallon kegs with their serving tubes removed. Once I transfer this wort, I cap the opening with a piece of sanitized foam, and cover the opening with tin foil. These vessels are then moved into my fermentation chambers, which are left open to allow the wort to cool to my desired Lactobacillus pitch temperature (anywhere from 90 to 115° F depending upon the strain used). Because the wort goes in boiling, the entire inside of the vessel is pasteurized using this process. I then simply have to use clean and quick transfer processes to introduce my Lactobacillus cultures after cooling to retain the sanitary nature of the wort inside. Unlike kettle souring or lower temperature transfers to fermentation vessels, I have never had a batch of beer become contaminated with wild yeast or unwanted bacteria using this methods. I have used this technique both for beers that were re-boiled after souring and for beers that were not re-boiled and simply received further pitches of Sacc, Brett, or both after an initial souring phase. In all cases, DMS has not been an issue in the finished beers, most likely due to off-gassing by healthy active yeast fermentations. This method certainly isn’t for everyone, but I thought I would share it here because, for me, it eliminates the step of pre-pitch wort acidification and saves a lot of the water expended during a traditional cooling process.
Traditional Lambic Wort for Spontaneous Fermentation
The production of traditional lambic-style wort is such a specialized topic that I decided to write about it in one section of the article rather than break its concepts up into each of the previous sections. While each Lambic producer in operation today may make minor tweaks to this process, all of them largely follow it as prescribed by the legal requirements to label their products as Lambic. Please keep in mind that Lambic, as an appellation, refers only to beers being produced using these methods within the Senne Valley of Belgium. In general, it is considered bad form for craft or home brewers elsewhere to label their products as Lambic.
Lambic wort is composed of approximately 66% malted barley (typically Pilsner or Belgian Pale Malt varieties) and 34 % unmalted wheat. This grain bill is mashed in at a ratio of approximately 12 to 13 lbs. per gallon of 143° F water resulting in thick mash with an initial strike temperature of 113° F. This temperature is held for 10 minutes.
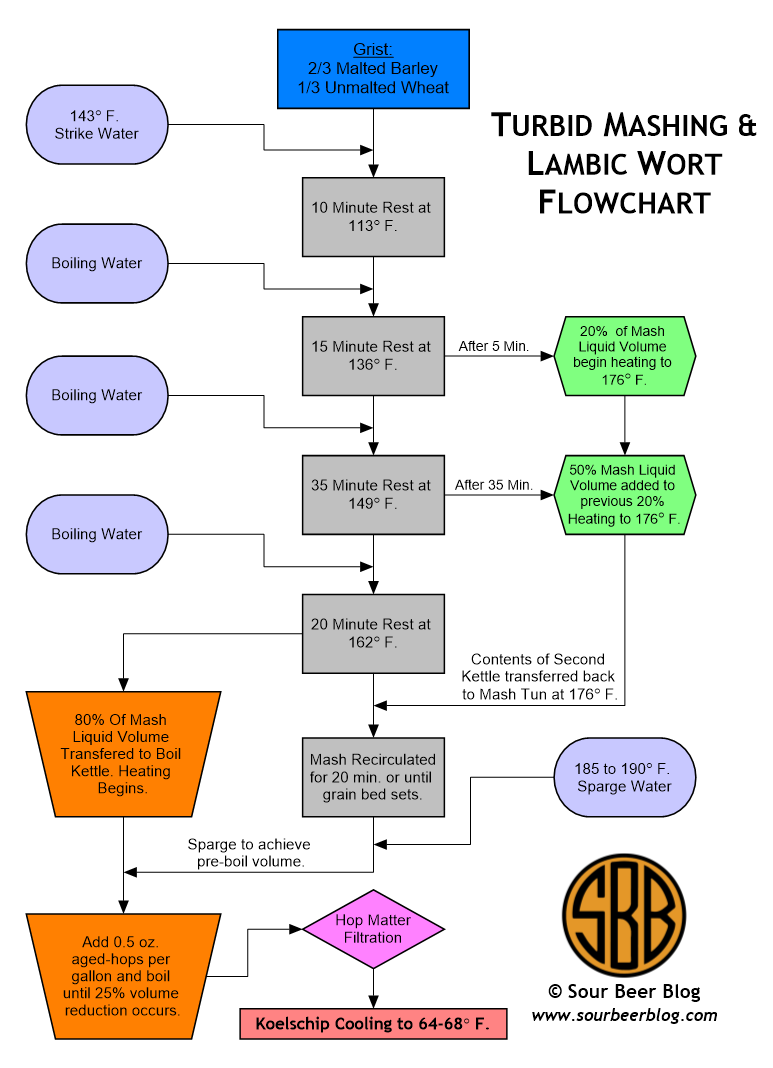
The transfers, temperatures, and timings of turbid mashing can be difficult to follow. I have created this flowchart to help brewers wanting to try out this traditional method.
After this initial rest, boiling water is added to the mash to achieve a temperature of 136° F. After 5 minutes, roughly 20% of the mash liquid is removed (traditionally using a woven basket device called a stuykmanden) and transferred to a second kettle for heating. You will want to monitor the vigor of the heating of this second kettle, as the contents of this vessel should never reach boiling. Rather, you are looking to heat this kettle up to but not above 176 to 180° F.
The mash will continue to rest for 10 minutes, at which point boiling water is again added to the mash bed to achieve a temperature of 149° F. The mash is allowed to rest at this temperature for 35 minutes, at which point roughly 50% of the remaining mash liquid is removed and transferred to the second kettle to be heated along with the original 20% volume removed previously.
Again, boiling water is now added to the grain bed, this time to reach a temperature of 162° F. The mash is allowed to rest at this temperature for 20 minutes before 80% of the mash liquid is drained into the boil kettle (not kettle #2) and began to be heated for the boil.
At this point, all of the mash liquid that was collected and heated in the second kettle should be at a temperature of 176° F. This liquid is now returned to the mash tun to achieve a mash temperature of approximately 167° F. The mash is held at this temperature and re-circulated to achieve a setting of the grain bed.
The last step of a turbid mash is to sparge the grain bed into the now heating kettle using 185 to 190° F sparge water. After sparging your total (pre-boil) volume in the kettle should be approximately one gallon for every 1.1 lbs of grain initially mashed. While this may seem like a low ratio, it will ultimately result in a beer with roughly 5% ABV after undergoing a 25% reduction in volume through boiling and fermenting to near 100% attenuation.
After collecting your initial kettle volume, you will add about one-half ounce of aged whole-leaf hops for each gallon of wort collected. This wort is then boiled to achieve a 25% reduction in volume, a process which typically takes around 4 hours.
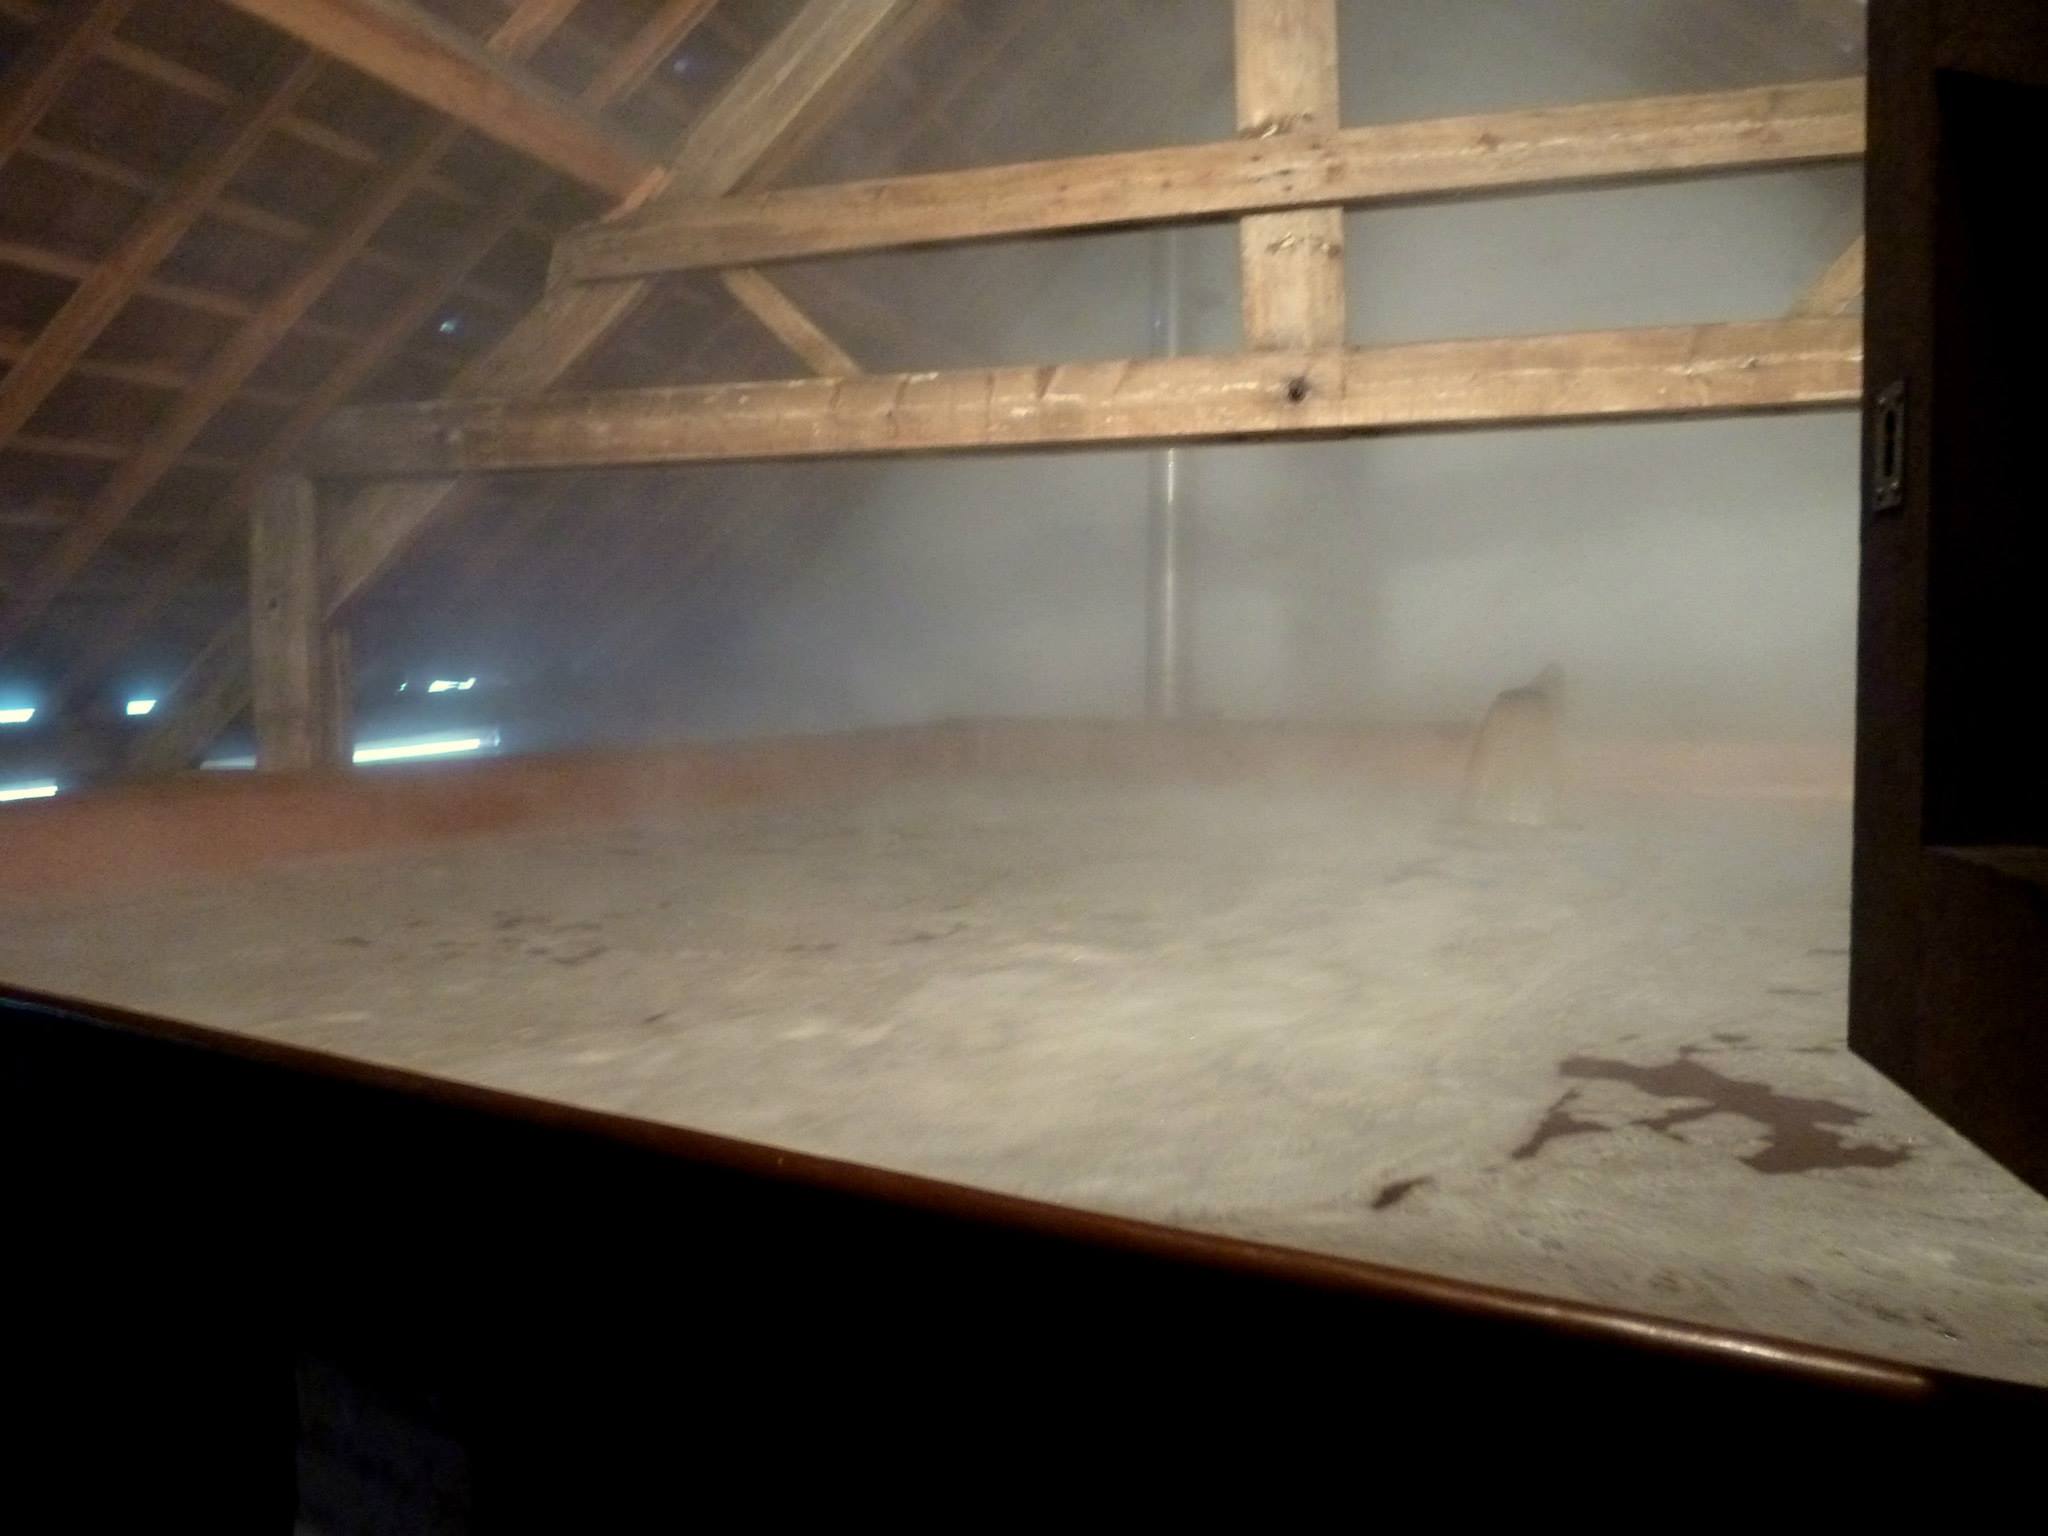
Wort Cooling in Cantillon’s Coolship – Photo by Kevin Desmet @ Belgian Beer Geek
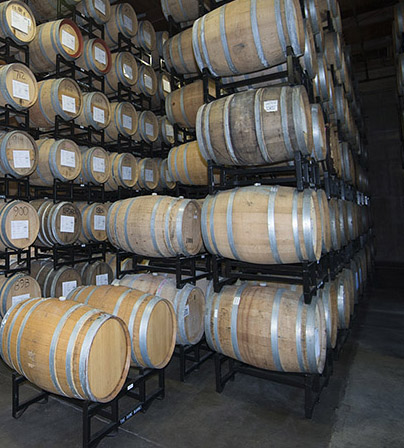
At this point, the wort is pumped into a large shallow vessel called a koelschip (coolship) and allowed to cool overnight. During the cooling process, the koelschip room receives ventilation with ambient outdoor air which carries with it a variety of wild yeast and bacteria. The outdoor temperature must be sufficiently cool (below 40° F) for this natural process to effectively cool large volumes of wort overnight. In general, this lambic wort is allowed to cool to roughly 64 to 68° F before it is pumped into a homogenization tank and loaded into oak or chestnut barrels to ferment.
The end result of these processes are a wort that is loaded with starches, tannins, and antimicrobial hop compounds while being relatively low in isomerized alpha-acids. Additionally, the aged hops added to lambic wort carry both cheesy flavors due to isovaleric acid and hay-like / papery flavors due to the oxidation of hop matter. Therefore, some portion of the funky flavors in traditional lambic are actually contributed by the hops before Brettanomyces even gets involved. The starches present in the wort (which may literally be milky white with them) provide a sustainable long term food source for microbes that will continue to create flavor complexity for years in the barrel. Lastly, the grain and hop tannin content, which makes young lambic wort practically undrinkable, will be transformed with time to provide a wonderful mouthfeel and structure to these beers akin to that found in mature red wines.
Is this process the best or only way to make a long-aged and blended sour beer? That is a difficult question to answer. It’s certainly not the only way, and best is in the eye of the beholder, but it can be asserted that this method will produce a beer with flavors difficult to achieve by any other means. The flavors of raw wheat, aged hops, and grain tannins aren’t present together in any other style of brewing, which intrinsically makes this method unique even before the organisms collected by spontaneous inoculation become involved.
I think that we have just entered what is the most interesting and exciting time for sour brewers since the inception of craft beer in America. Experimentation and information are at an all time high, and the results of spontaneous programs at breweries like Allagash, Jester King, Russian River, and Funk Factory have drawn back the curtain and let us see the wizard so to speak. We now know that spontaneous programs outside of Brussels not only work, they produce fantastic beers with characteristics unique to their local terroir. I find it invigorating to see more breweries experimenting with these methods, and I’m sure far more experimentation is yet to come. For example, there is nothing specific to the process which requires that a beer be a pale golden ale based on Pilsner malt. Modification of the barley portion of the lambic-style grain bill alone opens up a wide range of possibilities for new uniquely craft styles of spontaneously fermented sour beer.
Conclusion
I hope this has been an interesting and informative article that will help sour brewers with recipe creation and brew day planning. While beer recipe creation is a topic that must be fully learned with experience, experimentation, and refinement, everyone needs a starting place which hopefully I have provided here. The take-home message for your recipes and brew day is to keep a full picture of the sour beer’s life cycle in mind. These beers are  conceived in our minds, born in our kettles, matured through a partnership with a team of microorganisms, and become all that they can be with our help through blending. Hopefully when you read this article in conjunction with The Fundamentals of Sour Beer Fermentation and Sour Beer Blending, you will not only have gained an understanding of this picture, but you will be inspired to begin crafting sour beer portraits of your own!
As always, I welcome any questions, comments, or discussion that this article may generate.
Cheers!
Matt “Dr. Lambic” Miller
References
Arthur, Tomme. “SAILING ON THE S.S. LAMBIC.” All About Beer. All About Beer Magazine, 22 Apr. 2013. Web. 1 Dec. 2016.
Bickham, Scott. “Flavors From Malt.” Flavors From Malt. MoreBeer, Web. 1 Dec. 2016.
CraftBeerBrew. “Turbid Mashing.” Craft Beer & Brewing Magazine. Web. 1 Dec. 2016.
Daniels, Ray. Designing Great Beers: The Ultimate Guide to Brewing Classic Beer Styles. Boulder, CO: Brewers Publications, 1996. Print.
Guinard, Jean-Xavier. Lambic. Boulder, CO, USA: Brewers Publications, 1990. Print.
“Glycosides: The Hidden Flavors.” Beer Sensory Science. Beer Sensory Science, 30 Nov. 2010. Web. 1 Dec. 2016.
Parkes, Steve. “Understanding Enzymes: Homebrew Science.” Brew Your Own. Web. 1 Dec. 2016.
Sharp, Michael. “Brasserie Cantillon.” Forum on Lambic Beers. Lambic Digest. 14 May 1995. Web. 1 Dec. 2016.
“Spontaneous Fermentation.” Milk The Funk Wiki. Milk The Funk, 21 Nov. 2016. Web. 1 Dec. 2016.
Tonsmeire, Michael. American Sour Beers: Innovative Techniques for Mixed Fermentations. Boulder, CO: Brewers Publications, 2014. Print.
“Weyermann®.” Malt Aroma Wheels. Weyermann®. Web. 01 Dec. 2016.